Fresh From Mom's Kitchen
So while I am searching for power cables and digging through boxes...
The last few weeks my Mom has been making fantastically yummy yogurt!
And from her food storage supply no less!
She told me both in person, and on the phone, how easy it was to make (we both eat a lot of yogurt) - but I was on the doubtful side...
Until she sent me this awesome step by step tutorial with pictures!
Now as soon as my kitchen pantry is unpacked I will be testing this out!
Since it was so easy...
and such a great way to keep your food storage current...
I couldn't resist sharing it!
So my Mom is my guest blogger today, straight from her kitchen!


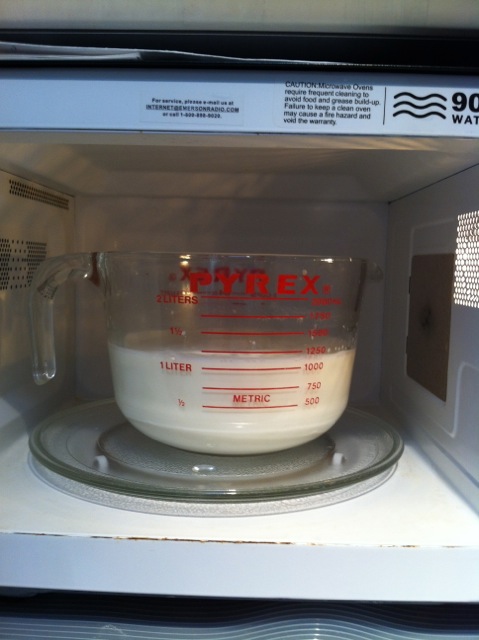
Heat milk to 180-185 ℉. I use my microwave on 80% power for about 10 to 12 minutes.


Whisk the live culture yoghurt into the cooled milk and then fill the sterilized containers.


See how the milk has thickened into yoghurt, yum! Perfectly smooth, oh yeah!


I am really glad I experimented with making home made yoghurt. Hope you have fun trying this, too:)


The last few weeks my Mom has been making fantastically yummy yogurt!
And from her food storage supply no less!
She told me both in person, and on the phone, how easy it was to make (we both eat a lot of yogurt) - but I was on the doubtful side...
Until she sent me this awesome step by step tutorial with pictures!
Now as soon as my kitchen pantry is unpacked I will be testing this out!
Since it was so easy...
and such a great way to keep your food storage current...
I couldn't resist sharing it!
So my Mom is my guest blogger today, straight from her kitchen!

My Mom and Me - I love how much we look like each other!
Making home made yoghurt turned out to be very easy!
Gather all your clean equipment onto a clean counter. Wash and sterilize the containers.
I brought my daily yoghurt containers home from France - great souvenir, oui!
Mason jars come in a 4 oz size for a perfect single serving size.
(Note: Ingredients are - Non Fat powdered milk (we get ours from the LDS cannery in #10 cans) - a pitcher of filtered water, from your sink or fridge is fine! - heavy cream - a few tablespoons of yogurt that already has a live culture, grocery store bought works for your first batch, then you can use your own yogurt for the next batch - glass jars of some sort to put your yogurt in - aluminum foil - wax paper - and as many rubber bands as you have containers!)

Mix up the powdered milk double strength, see directions on can. I use filtered water.
(For those not using LDS Cannery products, just follow the directions for reconstituting whatever powdered milk you are using, but don't forget to make it double strength!)


I also like to add a splash of cream, however it's not necessary.
The cannery milk is rich in protein and makes a very smooth and silky yoghurt on it's own.


Use an instant read thermometer to check the temp a couple times.
You don't want the milk to overheat and definitely don't let it boil.

While you wait tear wax paper and aluminum foil in squares large enough to cover
your containers. If you are using mason jars, sterilize the lids and rings.

Now the milk needs cooling down to 110℉ before adding several tablespoons of
live culture yoghurt either store bought or some saved from your last batch.


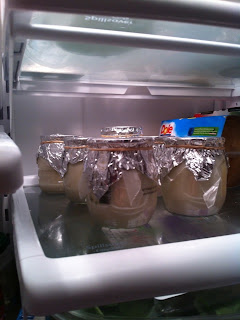
Cover, first the wax paper.

Then with the foil.

Then smooth them down tightly around the neck of the jar and secure with a rubber band.

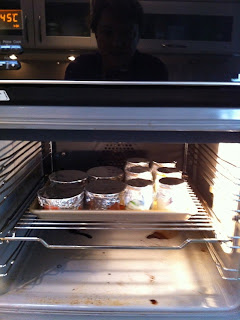
Now they need to incubate at 110℉ for at least 4 hours up to 9 hours. The longer the
time the more acid is produced and the yoghurt will have a stronger 'yoghurt' smell and taste.
I use my oven. It's digital and will hold at this low temperature. 4 1/2 hours is perfect for me.

There are lots of methods to maintain the desired temp. Use a thermos, a cooler lined with
towels or newspaper, a box padded with newspaper with bottles of hot water placed in each corner
or a purchased yoghurt maker. How about a hot summer day in Florida out of the direct sun?
The internet has tons of ideas.
Whatever method used, don't disturb the jars. Jostling them stops the culture from growing.
Too hot kills the culture. Too cool and the culture slows down too much. Thin and runny yoghurt results.
Once your chosen time arrives bring the jars to room temp and then refrigerate immediately.
Once they are cooled overnight they will have firmed up to the thickness we know and love.

I like mine plain, but you can put a tablespoon or 2 of your favorite jam in the jars
before you fill them and process them. I eat mine with fresh fruit and low fat granola.
{ 11 Hours Later I received the rest of the instructions and photos!
Real time cooking here! }
I am really glad I experimented with making home made yoghurt. Hope you have fun trying this, too:)

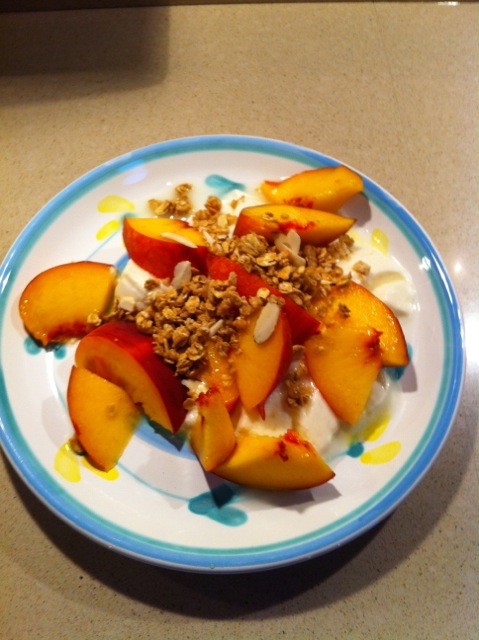
Decant onto serving dish or into a parfait glass for a dessert after dinner.


Slice and dice fresh fruit over top and sprinkle with low fat granola. I like almond granola.
Note there is a small amount of whey just glistening at the top of the plate.
This is normal even for commercially produced product.
Have a great day,
mom
PS you can also drain yoghurt in a cheesecloth lined strainer over a bowl in the frig for an hour or two and have a more greek yoghurt thickness. Overnight it's more like soft fresh cheese.

I added chopped fresh parsley and chives with grated fresh garlic, ground white pepper and sea salt with a large handful of freshly grated parmesano reggiano cheese. Then ate it in one sitting - beware!
I can't wait to make this in my new kitchen! Yum!


This was so easy and fun to do! And taste was superior to store-bought. I hope some people try this out!
ReplyDeleteLove ya, mom